Posts tonen met het label photography. Alle posts tonen

dinsdag 22 januari 2013

How to make your own redscale

how to

This is one of the most awesome things to do if you want those cool vintage pictures.

This is what a redscale picture looks like:

redscale


Let me explain:

What is redscale?

Film uses different layers of light sensitive film. When you take a picture with a normal film, the red layer is the last layer to be exposed to the light. That means the back layer is the red one.

A redscale has the red layer of the film in front. So basically, redscale is film exposed from the other side.


How do you make it yourself?

You can buy your own redscale at the lomography store. But making your own redscale is fun, and a lot cheaper!

What you need:

  • A completely dark room, or a dark bag for film(you can buy those at your local photography shop)
  • A film you can’t use. (Film A) (Already exposed, from a thrift shop camera, expired etc.)
  • Your film you want to turn into a redscale. (Film B)
  • scissor
  • tape

Making the redscale:

  • Take film A and pull out all the film, then cut off the most of the film. Leave about 3cm on there. (you can do this in a room whit the lights on)

1

  • Get all your stuff into your dark bag or room. Make sure to place them before you turn off the light so you know what is where.
  • Make sure your room (or bag) is completely dark. Only if you’re sure your place is completely dark, go to the next step.
  • Again, YOU NEED TO DO THIS IN COMPLETE DARKNESS! Grab film B and cut off the first 4cm. You have to cut of the thin part.

foto 2

  • Now take the almost empty film canister from film A. Turn around the film B and tape those two parts together. So the good side of film A is taped to the “wrong” side of film B.

foto 5

foto

  • Now wind up the empty film until your canister from film B is empty, and film A is full.

foto 4

  • Cut the two films apart and then cut in the thinner part a normal film has in the beginning of film A.

bbhj

foto 1


VOILAH! Load your film into your camera, and you have got your own home made redscale film!

Sorry for the crappy drawings, but it looks easier with the pictures.

OH! One more thing: For the best results, shots need to be over exposed by one or two stops to achieve correct exposure on developing. And don’t forget to tell the person who is developing the film there is tape at the end of the film!!! If you don’t, the developer could crash his machine (if the developer does his or her film development with a machine)

HAVE FUN SHOOTING AWESOMENESS!

vrijdag 28 december 2012

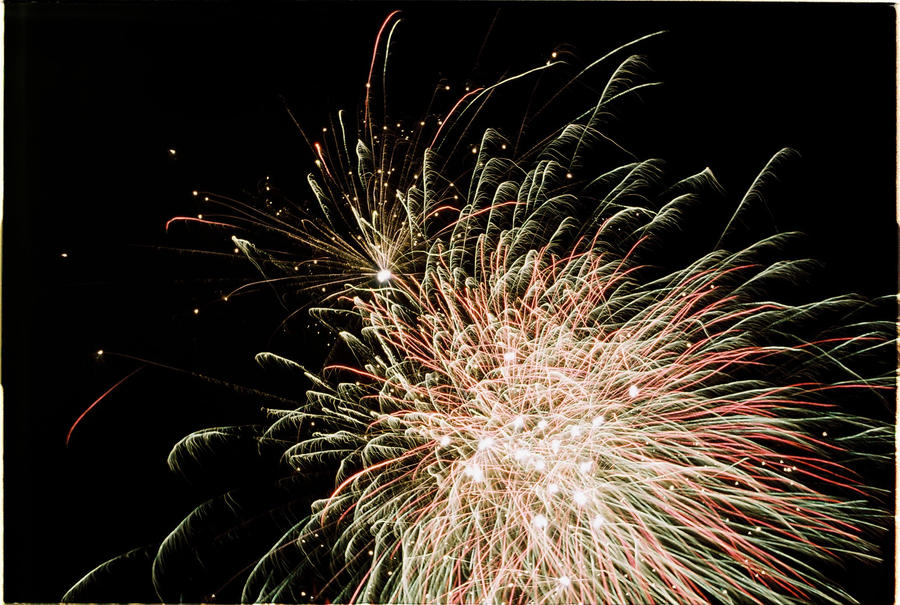
Beginners guide–New years firework photography.

how to

I have been writing about the basics of the analogue photography. About film, aperture and shutter speed. If you know how those 3 things work, and know how to use them on your analogue camera, you’re ready to learn some more things that make photography fun. Since new year is coming up I thought it would be fun to work on some firework picture skills. If you haven’t read the basics and you want to know more, here are the basics:

Part one.

Part two.

Part three.

If you’re not in the mood to read all those post, I suggest to only read part three. Its about shutter speed. Which is important in this post. If you don’t know how it works, you wont understand what I ‘m telling you guys in this post.


New year is coming up and you’ve probably bought some firework to celebrate it. Ever tried to take a picture of the firework with your little pocketsize digital camera? There is a big chance you never get the whole explosion of colors and lights on your picture. Why? Its because your camera probably doesn’t has shutter speed options. It takes one or two seconds for the firework to fully explode in the air. Your digital camera probably takes such a small shutter speed it doesn’t get the full beautiful firework picture you want. So take out your dusty old vintage camera and a tripod. Put roll of 100 or 200 ISO film in your camera and go outside to take some pretty awesome firework action pictures!


So how does it work:


Take your camera outside. Put it on your tripod and make sure it cant move when you want to tae a picture. Look through your lens and wait the first few times to check if the firework is completely in your viewfinder. If your composition is good, check your settings. Put the focus on infinity.  The setting looks like a little 8, put sideways.

Then check your shutter speed. It has to be on the B setting, which means that the shutter speed will be as long as you push your shutter button.


Now you’re ready. Wait for the firework to come in your viewfinder. The second you see it popping in sight, press the shutter button. Keep pushing it until you got the full explosion on there.


Now you have captured the firework from the beginning till the end and you will have a beautiful picture!

Have fun shooting your new year firework, and have a very happy new year of course!

Good luck shooting beautiful pictures!

zaterdag 22 december 2012

The beginners guide to Analogue photography. 3 --shutter speed--

how to


Already the third post on the beginners guide, for the other parts, just click:

Part one

Part two


So we have come to the third most important part of photography. Shutter speed.

Shutter speed goes hand in hand together with the aperture to make a good exposed picture. The shutter speed is the speed of which the shutter opens and closes when you take a picture. You can put you camera on a tripod, put your shutter speed on 1 second, and take a better picture in the dark. Of course that’s only possible with objects that don’t move if you want a sharp picture.

In an SLR camera, which is the sort of camera I focus on, the shutter is part of a mirror. That mirror reflects the image into the film. You can actually see it if you take of you lens.

The camera on the picture is one I got just a few days ago, that’s why its dusty on the inside. I still need to clean it up and repair it. That’s why I can show you the mirror. If you take of your lens, note that it is not good for your camera to hold your camera the same way as on this picture. There is a possibility that dust, rain, or something else could come in there. Always hold the opening towards the ground the most of the time. (When you need to change the lens you should probably know this)

foto


The shutter speed settings are on your camera. Most of the cameras have the following settings: B/1/2/4/8/15/30/60/125/250/500/1000/2000/4000. These numbers aren’t in seconds of course. The 1 is one second, the 2 is 1/2 second, the 500 is 1/500 second. So is 1/4000 a real quick shutter speed.


snollethes

There has to be a lot of light to make a picture with such a quick shutter speed, cause there is not that much time for the light to expose the film. Though, a high shutter speed comes in very handy if you want to have a sharp picture. A picture taken with a low shutter speed has more chance that the object you’ve taken a picture of has moved and isn’t sharp.

The B setting is the setting you can use if you want your own shutter speed. You can wind your film and press the shutter button for as long as you want. the shutter will be oven as long as you hold your button down.

That is why aperture and shutter speed are so important and go hand in hand with each other to make a good exposed picture that is sharp too!

To make it more clear what shutter speed does, here is a picture of a falling object, taken with two deferent shutter speeds. I found it on the internet.


Now you know the 3 basics of analogue photography. But I’m not done yet! You’re now able to take a good sharp picture with your analogue camera. But what about the awesome double exposures, or redscales? I’m going to do a few more post on how to play with your settings to get some awesome (and maybe a bit weird) pictures from you camera!

woensdag 19 december 2012

The beginners guide to analogue photography. 2 --- Aperture.


how to


Part one here!

Now you know what kind of camera, and what film to use. So on to part 2 of the beginners guide to analogue photography. Making beautiful pictures on an analogue camera is a bit harder than with a digital camera. You really have to think what you are going to take a picture of before shooting. If you failed to take a good picture, it is a waste of your film, and development. So a waste of your money! Before making a picture, think about the composition of your photo.

The aperture is one of the tree most important things to make a good picture.  The other two most important things to make a good picture are light sensitivity, which I already explained, and shutter speed, which will be explained in the next post.

The aperture controls how much light your film will get. The amount of light that hits the sensor determines how much depth there is in the picture. Depth of field is the distance within which the subject in the picture appears sharp. By playing with the aperture value you get a completely blurred background or a completely sharp background and everything in between. So the aperture offers you possibilities for creative photography.

boo


The Diaphragm (= aperture) is located in your lens, the settings are on the side of the lens indicated with an F/number. The numbers vary from F/1.4 to F/32. Some lenses have even more, but those would be really special professional lenses.

Let me show you the difference between a high and a low aperture:

Low aperture: +/- F/2.8

Fotografie diafragma


High aperture: +/- F/3

Fotografie diafragma

There is one other thing that is important to know about the aperture. A low aperture can cause over exposure of your film! I found this picture on the internet, It shows what happens with picture when you shoot with a high and low aperture. (So the pictures are from high to low)


I think that was it for explaining the aperture. If you think I’ve missed something, please comment what. I will include it if its important.

Thanks!

Part 1 – 12/18/12

Part 3 – 12/22/12

Part 4 - 

zondag 16 december 2012

Analogue #5–The Praktica TL-1000—GIVEAWAY?!


bogggggg


It’s time for a new analogue camera to show you guys! This time it’s the Praktica TL-1000. This camera is not that old. It started producing in 1980 and stopped producing in 1984. This is a beautiful camera to look at! Real eye candy. Though, I found it disappointing the black grip is made of plastic. The whole camera feels a bit like a toy camera because of that plastic.

I Do love the simplicity of the camera. It has just a few settings, but is able to make some pretty good pictures. (for what I have seen, I haven’t got the pictures back from development). I have been looking for lenses for this camera in thrift shops. A good plus for this camera. There are loads of lenses in thrift shops everywhere!

Tip: If you want to buy lenses, bring your camera with you, and fit them on your camera body. Do not buy them without fitting. Secondly, never forget to check if there are scratches on the lens. If there are scratches, just use the same method which I had told you guys in my post about how to buy the right vintage camera. FIRST ask how much it costs, THEN tell the owner it’s broken. You’ll end up paying a lot less.  Why buy a lens with scratches? well, if you got yourself one for a small price (I would give 1,50 euro’s for a broken lens)  You can take pictures with them, you’ll get some cool effects. Here is a picture taken with a scratched lens (there is some dust on there too)

1a4196b3d618e05e8b9068a90757ce0baab8a66c

One other thing.

I was having a good idea about something. I was thinking about a giveaway when I hit 50 followers (only for the followers on glipho). As soon as I hit that 50, I will write a post about a really cute camera. If you would like to win it (free for everybody, I will send it to you and I will pay the shipping costs) you have to comment on that post, and you have to be following me. Good idea for al those who love vintage thrift shop junk! (More information about this giveaway in the actual giveaway post)

So what do you think?

dinsdag 27 november 2012

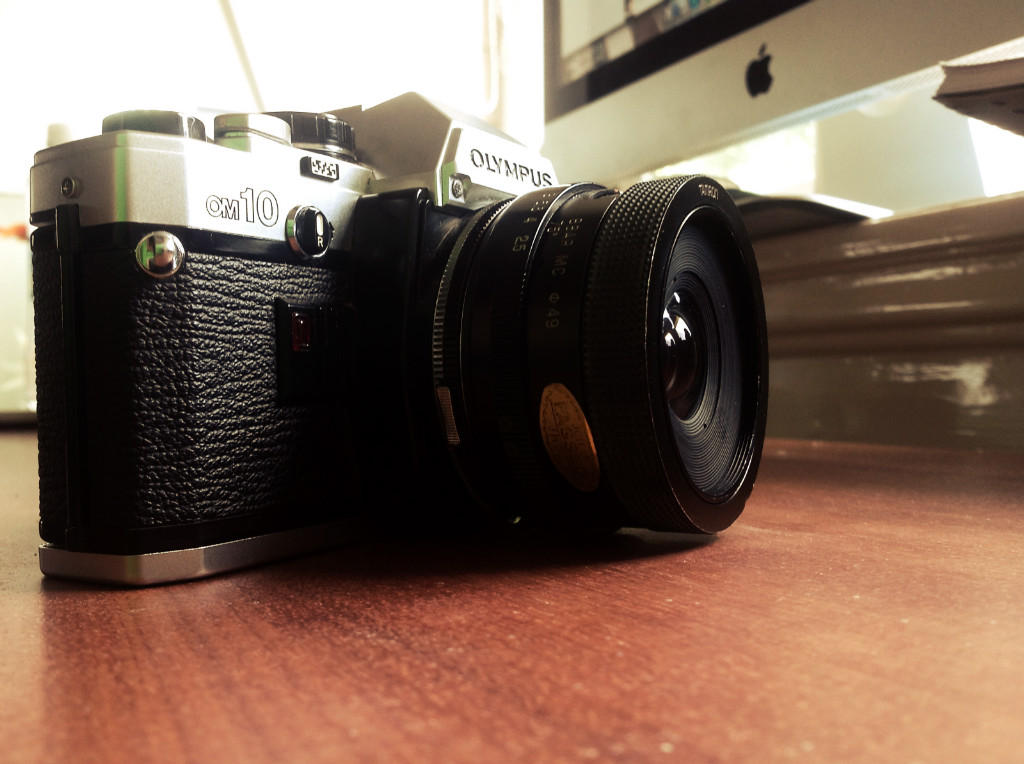
Analogue #3 The Olympus OM-10

As promised, the next blog post on my analogue camera’s. Already the 3rd one, but no worries, I still got a lot of cameras to go! This time it’s the beautiful SLR-camera Olympus OM-10.

I had bought it at a giant thrift shop in Hilversum. I absolutely love this one, I had brought it with me to Turkey (vacation) and used it for a school project. It is Ideal for a lot of reasons. For example the lenses. Olympus has a whole OM-system which includes lenses! you can buy them on eBay for a low price.  Here are some pictures I made with my Olympus OM-10:

006

002

The Olympus OM-10 is a 35mm film camera. This camera is part of the OM system which Olympus launched in 1972. The Olympus OM bodies were divided in a high range and a middle range. The Olympus OM 1,2,3 and 4 where the high range category, the two middle where the middle range cameras, and the cameras above that where the lowest range. This way, Olympus was able to built a lot of camera parts that where the same and later put in the expensive equipment for the Olympus 1,2,3 and 4. So you where able to have a good quality camera for a lower price.
The Olympus OM-10 was launched in 1979. The early productions of the OM-10 have had malfunction issues with electronics, metering, and shutter magnets. So If you want to buy one at the thrift shop, make sure to check if the metering and shutter works. If you don’t know how to check your metering and shutter, you can read my other blog on how to buy the right vintage camera.  
If you’re looking for a good quality camera, you should take a look at this one. Its beautiful and it has this lovely “click’’ sound when you take a picture.
For the fun, here is the commercial of the Olympus OM-10 back in 1979:

If you have any questions, or think there is something missing in the information that MUST be included, please comment! If you’re looking for 35mm film, just click here.

zondag 4 november 2012

Cameras, real old cameras.

As some of you know, I’ve got quite a few old analogue camera’s. So I thought, wouldn’t it be nice to show them of a little!
I started collecting old camera’s last year. I had bought my Olympus trip 35. which is a perfect camera to use if you want to start trying out the analogue side. It doesn’t use battery's and it works almost automatically. The only thing you have to do is focusing. Then I started actually looking for them in thrift shops. AND THRIFT SHOPS ARE FULL OF OLD CAMERAS!
My Idea is to weekly, or monthly (don’t know yet) post an article about one of my cameras. So next week, the first one will be posted, about my first camera, the Olympus trip 35. And the week after that (or month) I will show you my second camera, my polaroid image 3. And so on….
I will tell you how I got it, how old it is, and maybe some funny things about the camera!
Here are some pictures of the camera’s I’ve got!


Have a nice weekend!


.

woensdag 31 oktober 2012

Analogue picture time!

002

Today I got the pictures back from development! These pictures where the first ones from my Olympus OM-10. I;’m so happy with the outcome!

421652_487493431270585_291623554_n

My Olympus!

I have had a school assignment for my art class. I made a series of pictures that all had to have some kind of emotion in them. THANKS Ruben, for letting me put water in your eyes and make you cry! haha!

009

I actually asked Ruben to shout as loud as possible in the picture above!

013

003

004

The other pictures are just some random pictures I took to get the 25 pictures I needed before I could take out the roll. For the analogue people out there: I used a Lomography ladygrey 35mm 100ISO roll, and had my diaphragm on 5.6!

I took one of those random pictures for you guys to see!

006

Have a nice week! I’ll be learning the whole time :(

Oh ok, I will sleep and eat too, don’t worry….


.