zaterdag 29 december 2012

The chair–Part 4–The making of…

I haven’t been writing about my chair progress a lot. I have been reading your ideas and comments though! I have been designing, calculating, brainstorming, researching, diving in art design books and more.

I’ve got 400 empty cans, what to do to make a chair with it? hmmm…I came to the conclusion that I need to make a frame. The consumer can buy this frame, and put in its own cans. So the frame has to be designed so, that you only need about 30 cans to sit on it. Since you’re probably not able to recycle hundreds of cans in just a few weeks. And you don’t want to be recycling for years and years before you can actually use your chair.

I was designing a few chairs when I got to the perfect idea! I’m going to use planks. In between those planks you can put your cans. Its hard to explain. Let me show you what I mean.

171011

That is what happens when I write down what is in my head. I know, it looks like a total chaos. But if you look good you’ll understand it. Even if you don’t read Dutch.

With the design all worked out. I was ready to get some wood and get started. In one of my previous chair post you can see the research on what wood I wanted. I had chosen softwood. which is the most beautiful. I drew the shape on the wood first, then I sawn it.

263

It was time too drill in the curves so the cans cant move. I first put all the cans on the chair to check how I wanted to place them. Then I calculated where the circles needed to be and I drilled them out.

45

Then I fitted the cans in again. There wasn’t enough time to drill the whole plank. But I got this far:

12131415

I’m sorry this post is more a photo album than an actual post, but its easier to just show you guys then to write it all down. Let me know what you think of it. Or if you have any ideas, let me know! Just comment on this post. If you have any questions or really great idea that you want to ask or tell me directly, you can mail me on:

dutch-story@hotmail.nl

I really appreciate every idea and comment!!

THANKS :)

vrijdag 28 december 2012

And the winner of the giveaway is….

Wooh! I was not expecting so many people wanting those camera’s, and I’m very happy to give one away. To make it as fair as possible I have decided to put all of your names and e-mail addresses on a piece of paper.

bluhh 

Then I decided to cut the names out and fold them identical. Then I Put them in a hat and picked out one of them…. And the winner is……

8920578252

hoed

hoedjesdonker hoedbluggrhjkfshue

CONGATULATIONS PASTEL BOKEH!

Your Kodak starlet brownie will come to you soon! I have mailed you on the email you commented to get more information, like your address.

Its ready to send!

ready!

Missed this giveaway? No worries! I will give away another camera at 75 followers!

Beginners guide–New years firework photography.

how to

I have been writing about the basics of the analogue photography. About film, aperture and shutter speed. If you know how those 3 things work, and know how to use them on your analogue camera, you’re ready to learn some more things that make photography fun. Since new year is coming up I thought it would be fun to work on some firework picture skills. If you haven’t read the basics and you want to know more, here are the basics:

Part one.

Part two.

Part three.

If you’re not in the mood to read all those post, I suggest to only read part three. Its about shutter speed. Which is important in this post. If you don’t know how it works, you wont understand what I ‘m telling you guys in this post.


New year is coming up and you’ve probably bought some firework to celebrate it. Ever tried to take a picture of the firework with your little pocketsize digital camera? There is a big chance you never get the whole explosion of colors and lights on your picture. Why? Its because your camera probably doesn’t has shutter speed options. It takes one or two seconds for the firework to fully explode in the air. Your digital camera probably takes such a small shutter speed it doesn’t get the full beautiful firework picture you want. So take out your dusty old vintage camera and a tripod. Put roll of 100 or 200 ISO film in your camera and go outside to take some pretty awesome firework action pictures!


So how does it work:


Take your camera outside. Put it on your tripod and make sure it cant move when you want to tae a picture. Look through your lens and wait the first few times to check if the firework is completely in your viewfinder. If your composition is good, check your settings. Put the focus on infinity.  The setting looks like a little 8, put sideways.

Then check your shutter speed. It has to be on the B setting, which means that the shutter speed will be as long as you push your shutter button.


Now you’re ready. Wait for the firework to come in your viewfinder. The second you see it popping in sight, press the shutter button. Keep pushing it until you got the full explosion on there.


Now you have captured the firework from the beginning till the end and you will have a beautiful picture!

Have fun shooting your new year firework, and have a very happy new year of course!

Good luck shooting beautiful pictures!

zondag 23 december 2012

Its mango-mint Ice-cream time!

I have made the most healthy, delicious, green looking ice-cream I’ve ever ate in my life! I swear, you should try it! Its so easy to make. Just put all the ingredients in the blender and BLEND! :)

ijsje eten

You need:

2 mangos

250 ml yoghurt

One lime

A handful of mint leaves

Step one.

Cut your mango in pieces. and put them in the freezer for about an hour or two. I did it the night before, that’s easier of course.

foto 2foto 3foto 4

Step two.

Take out your mangos and put the pieces in the blender. Ad the yoghurt and your handful of mint. Rasp the skin of the lime of and put that in the blender too. Blend it all together and put it all in the freezer again for about one hour.

foto 5foto 2


Then serve it! YUMMY!

zaterdag 22 december 2012

The beginners guide to Analogue photography. 3 --shutter speed--

how to


Already the third post on the beginners guide, for the other parts, just click:

Part one

Part two


So we have come to the third most important part of photography. Shutter speed.

Shutter speed goes hand in hand together with the aperture to make a good exposed picture. The shutter speed is the speed of which the shutter opens and closes when you take a picture. You can put you camera on a tripod, put your shutter speed on 1 second, and take a better picture in the dark. Of course that’s only possible with objects that don’t move if you want a sharp picture.

In an SLR camera, which is the sort of camera I focus on, the shutter is part of a mirror. That mirror reflects the image into the film. You can actually see it if you take of you lens.

The camera on the picture is one I got just a few days ago, that’s why its dusty on the inside. I still need to clean it up and repair it. That’s why I can show you the mirror. If you take of your lens, note that it is not good for your camera to hold your camera the same way as on this picture. There is a possibility that dust, rain, or something else could come in there. Always hold the opening towards the ground the most of the time. (When you need to change the lens you should probably know this)

foto


The shutter speed settings are on your camera. Most of the cameras have the following settings: B/1/2/4/8/15/30/60/125/250/500/1000/2000/4000. These numbers aren’t in seconds of course. The 1 is one second, the 2 is 1/2 second, the 500 is 1/500 second. So is 1/4000 a real quick shutter speed.


snollethes

There has to be a lot of light to make a picture with such a quick shutter speed, cause there is not that much time for the light to expose the film. Though, a high shutter speed comes in very handy if you want to have a sharp picture. A picture taken with a low shutter speed has more chance that the object you’ve taken a picture of has moved and isn’t sharp.

The B setting is the setting you can use if you want your own shutter speed. You can wind your film and press the shutter button for as long as you want. the shutter will be oven as long as you hold your button down.

That is why aperture and shutter speed are so important and go hand in hand with each other to make a good exposed picture that is sharp too!

To make it more clear what shutter speed does, here is a picture of a falling object, taken with two deferent shutter speeds. I found it on the internet.


Now you know the 3 basics of analogue photography. But I’m not done yet! You’re now able to take a good sharp picture with your analogue camera. But what about the awesome double exposures, or redscales? I’m going to do a few more post on how to play with your settings to get some awesome (and maybe a bit weird) pictures from you camera!

donderdag 20 december 2012

-- Time for a giveaway! Win a camera! --

100th-4

Yes! its finally time again! I had promised you guys to do another giveaway as soon as I hit 100 followers! Go follow me and enter the giveaway!

I will personally put all of your names on a piece of paper and put them all in a bag. I pull out ONE of the names out on Saturday!

How to make a chance to win:

  1. Make sure you are following me (on glipho), if you’re not, you can’t win.
  2. Choose which of the cameras you want.
  3. Comment the name of the camera you would like to have on this post.
  4. Wait for one week. I will give you guys until Saturday.
  5. If you don’t have an e-mail somewhere on your profile or blog, please put it in the comment.
  6. You will make a bigger chance to win if you share this article on twitter too! I will put your name in the hat two times if you have shared it! If you do, please write #VintageCameraGiveaway1210 in your tweet so I can find it!

That’s easy right? Now let me show you what cameras you can win!

1) The concord 118.

This is such a fun camera! I brought a similar one with me to Turkey last year and had so much fun taking beautiful! I highly recommend you to bring it with you on vacation. Its so small (just over 10cm wide and 2cm high) it fits in your pocket! Your own little spy camera!  It uses 110mm film. You can buy it here.

cam

camcam


2) The Kodak Instamatic 33

This super cute camera is  a camera which was developed in the 1960s to simplify the use of film. It uses a 126 mm cartridge. Unfortunately it isn’t sold anymore. You’re lucky if you find it on Ebay!

foto 2

foto 4

So go post a comment which one you want! I will announce the winner of the camera in a blog post next week (Saturday).

WOOHP!!

woensdag 19 december 2012

The beginners guide to analogue photography. 2 --- Aperture.


how to


Part one here!

Now you know what kind of camera, and what film to use. So on to part 2 of the beginners guide to analogue photography. Making beautiful pictures on an analogue camera is a bit harder than with a digital camera. You really have to think what you are going to take a picture of before shooting. If you failed to take a good picture, it is a waste of your film, and development. So a waste of your money! Before making a picture, think about the composition of your photo.

The aperture is one of the tree most important things to make a good picture.  The other two most important things to make a good picture are light sensitivity, which I already explained, and shutter speed, which will be explained in the next post.

The aperture controls how much light your film will get. The amount of light that hits the sensor determines how much depth there is in the picture. Depth of field is the distance within which the subject in the picture appears sharp. By playing with the aperture value you get a completely blurred background or a completely sharp background and everything in between. So the aperture offers you possibilities for creative photography.

boo


The Diaphragm (= aperture) is located in your lens, the settings are on the side of the lens indicated with an F/number. The numbers vary from F/1.4 to F/32. Some lenses have even more, but those would be really special professional lenses.

Let me show you the difference between a high and a low aperture:

Low aperture: +/- F/2.8

Fotografie diafragma


High aperture: +/- F/3

Fotografie diafragma

There is one other thing that is important to know about the aperture. A low aperture can cause over exposure of your film! I found this picture on the internet, It shows what happens with picture when you shoot with a high and low aperture. (So the pictures are from high to low)


I think that was it for explaining the aperture. If you think I’ve missed something, please comment what. I will include it if its important.

Thanks!

Part 1 – 12/18/12

Part 3 – 12/22/12

Part 4 - 

dinsdag 18 december 2012

The beginners guide to analogue photography. Part one --- Film.

As some of you know, my first analogue camera was an Olympus trip 35. I had bought it in the thrift shop and didn’t have a clue how to use it. I can imagine a lot of people have got an analogue camera somewhere, or want to buy one. But are struggling with the same problem. So here is a good beginners guide to analogue photography. It will even include some tips and tricks for the most awesome multiple exposures and redscales! I will write it in parts, today part one. I will show you guys:

  • Why buying an analogue camera in the thrift shop is better than a new one (especially when you are a beginner).
  • What film do you buy for your camera?
  • What ISO/ASA is.
  • How to load and unload your camera.

First of all, buying an analogue camera from a thrift shop is pretty fun. Why? Because I know a lot of people who bought a new analogue camera. Which is not a real smart move when you’re starting analogue photography. A new analogue camera (for example, from lomography)  can cost you a lot of money. An analogue camera from the thrift shop is as good as a new one, (sometimes even better) and a lot cheaper. Plus, an old camera often has the name of the previous owner carved or written on the body somewhere. They always come with a little history you can fill in yourself. Not that I dislike lomography! Love that. But for a starter who is still finding out if they like analogue photography, the thrift shop is a cheaper solution.  I would recommend you to buy a real simple automatic analogue camera if you’re only shooting for the fun. If you’re planning on really thinking about what you are going to take pictures of, making almost art-like pictures, I would recommend you to buy a SLR camera, which has an exchangeable lens, ISO settings and shutter time settings. Scared you will buy a broken one at the thrift shop? DON’T PANIC! Just read my older post on how to buy the right vintage camera!

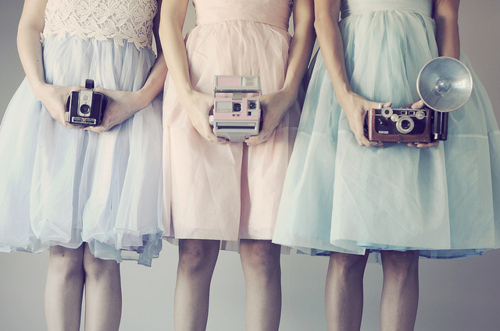
This is a SLR camera with an exchangeable lens.

snolletjes

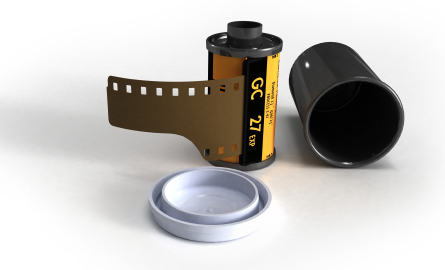
Already have an analogue camera? You would have to buy film for it. Now you have different film types. So first of all check what kind of film your camera uses. Most of you will have a 35mm film camera. But there are a lot more film types out there. The only ones that are being sold by lomography (not expired) are 110mm, 120mm and 35mm. You can also get instant film (for cameras like the polaroid land 1000 camera). I am going to focus on the 35mm films right now, since I’ve got the most of those, and those are the cheapest ones out there.

So, you are going to buy film. What kind of ISO do you need? ISO/ASA shows the light sensitivity of the film you are using. For example: You are having a party soon. Most of the party time is late at night. It will be dark. You will need a high light-sensitive film. You would have to use an 800 ISO/ASA film. If you are going on a summer vacation, there will be lots of trips to the beach, with a lot of sunlight. You won’t need a light sensitive film, because you have a lot of sunlight. You would have to use an 100 ISO/ASA film. If you’re going on a skiing trip, there will be loads and loads of light because the sunlight will reflect in the snow. Making  pictures on the slopes is possible with a 50 ISO/ASA film. ISO/ASA ranges from low numbers to real high ones (even 1600ISO/ASA). The most common ones are those between 50 and 800. Though, buying a high or low ISO film does influence the sharpness and contrast of your picture. Let me show you in a real simple table I made what kind of ISO you can use:

ISO/ASA Sensitivity Contrast grain
50 Low low low
100 Medium Medium Medium
200 Medium Medium Medium
400 High High High
800 Really High Really High Really High

If the right film is in the camera, you set your ISO settings on your camera to the same as your film says.  You are ready to take some cool analogue pictures.

snollethes

Don’t know how to put your film in your camera? Just watch this video:

Don’t know how to unload your film? Just watch this video:


So that was part one of the beginners guide.

The links to the other parts will come here:

Part 2 – 12/19/12

Part 3 – 12/22/12

Don't forget to fill in my survey, I need at least 50 people for this. Only 25 have filled it it right now.

http://www.enquetemaken.be/toonenquete.php?id=128030&p=1&zelf=0

And don't forget to follow me on Glipho! If I hit the 50 followers, I will give away a vintage camera to one of you guys. (You have to be following me for a chance to win)

maandag 17 december 2012

I remember…

I often get asked a question about how it was living in Singapore when I was a little girl. If people in Singapore talk a different language. Or if the culture is very different from the culture here in Holland. I wanted write some more about me, and how I grew up living in Singapore and in Holland to give you guys some answers.

I wasn’t born in Singapore, I was born in a small town in Holland called “Loenen aan de vecht”. I have one brother, he is one year older than me. We where both born in Loenen. At the age of 3 my father got a good job offer from the company he was working for. The job he had been offered was a job in Singapore. After thinking about it a lot. My parents decided to move to Singapore with our family. In 1997 we had to pack our bags and leave Holland.

In the plane:

foto 3

In Singapore we didn’t have a house the first couple of weeks, so we stayed at a hotel in the center of the city. I can’t remember a lot of that apartment. Only me and my brother building a tent in the living room out of blankets, and the windows. We had an apartment  that was located quite high. I can remember the windows where slantwise. I could look right down at the people walking beneath us.

foto 4foto 5


After a few weeks we moved to our home in Singapore. I remember thinking it was gigantic. though I was quite small so maybe it wasn’t. I loved that home, there was a rambutan tree in the back garden. It was gigantic and my brother and I used to climb in it all the time. Rambutan trees give fruit every year. The fruit looks a bit like lychees. They where delicious!

Rambutan1

After getting used to the heat, which was around 30-35 degrees Celsius every day, my mom and dad decided to hire a made. She could help my mom with cleaning and cooking. Her name was Lucita (aka Lucy). She lived in our home with us for over 2 years. I still miss her sometimes. She was very kind. I remember I wasn’t allowed to eat with my hands. Though, Lucita did eat with her hands when she was with her friends on her free days (they would eat some kind of rice).  As a little girl, that just wasn’t fair. I remember Lucita letting me eat with my fingers one day. She let me eat with her friends in the park, I was so happy!

We used to travel to a lot of places back then (now we still do). I remember going to Malaysia a lot. Not only for vacations. Singapore is a dictatorship. There is this rule, which sais nobody is allowed to eat chewing gum. And of course, my dad found it pretty fun to drive to the borders, get chewing gum in Malaysia, and drive back. I remember me and my brother chewing the gum my dad had bought in Malaysia. He would tell us to stop chewing every time there was police. Haha! We felt so badass.

Though, we did go there in trips quite a lot.

foto 2

foto 3

foto 2foto 1

I did go to school there to, In the first few months, I had to go to a Chinese kindergarten. I can’t remember a lot of that, except for the teacher who said “Ni Hao Ma Len?” Which meant something like “how are you”, or “good day”. After the Chinese school I went to the HSL. Which is a Dutch school for children from Dutch speaking families. At that school I actually made a lot of friends I’m still in contact with!

There is no actual Singaporean language, although Singlish is almost one. Its English, with a dialect. It’s hard to understand, but f you listen very good, you hear there are a lot of English words in there. I remember Singaporeans putting a “lah” after every line. That’s not really true though. This is how it sounds, only this is still quite understandable.


I could tell you guys a lot more about living in singapore, but that would take hours. Maybe I’ll do a big post once.

Hope you liked it! What do you remember from when you where little?


.